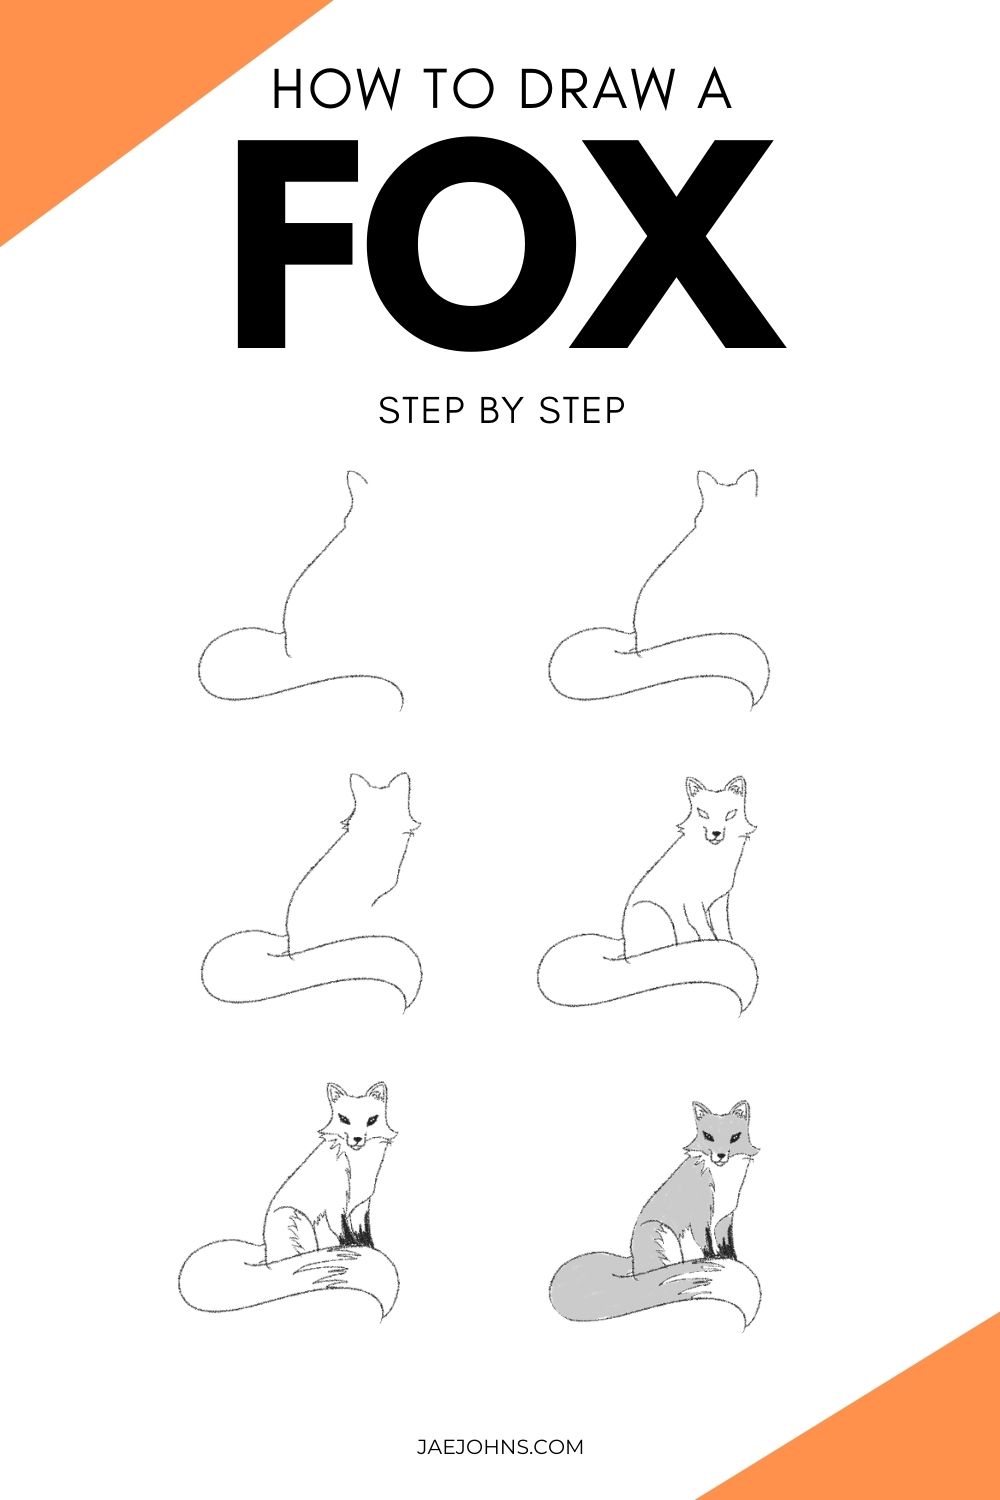
How to Draw a Fox Easy Step by Step
Do you want to know how to draw a fox? You may think drawing an animal is difficult.
Learning how to draw a fox is really easy.
These step by step pictures will help you draw a fox in a simple way that anyone can do.
Let's get started!
Other related topics to help you draw:
- How to Draw a Deer (Easy Step by Step with Pictures)
- How to Draw a Dragon (Step by Step with Pictures)
- Does Tracing Help Improve Drawing?
- How to Draw Dogs – Easy Step by Step Tutorial for Cute Dogs
- How to Draw a Cute Bunny (12 Easy Steps)

Drawing Supplies Needed
All you need is something to draw with and something to draw on.
Click on the following link if you want to know what are the best tools for drawing.
Step 1: Draw line for fox head

Start with a small squiggly line
Step 2: Draw line for fox back

Continue the line at the bottom with a wide curve getting larger at the base
Step 3: Draw line for fox tail

At the end of that line we'll start the guideline for the tail!
A little above where you ended the previous line we'll create a very elongated "C" shape with a downward turn.
At the same time back at the top, bring a rounder line downward from the peak.
Here we have an ear!
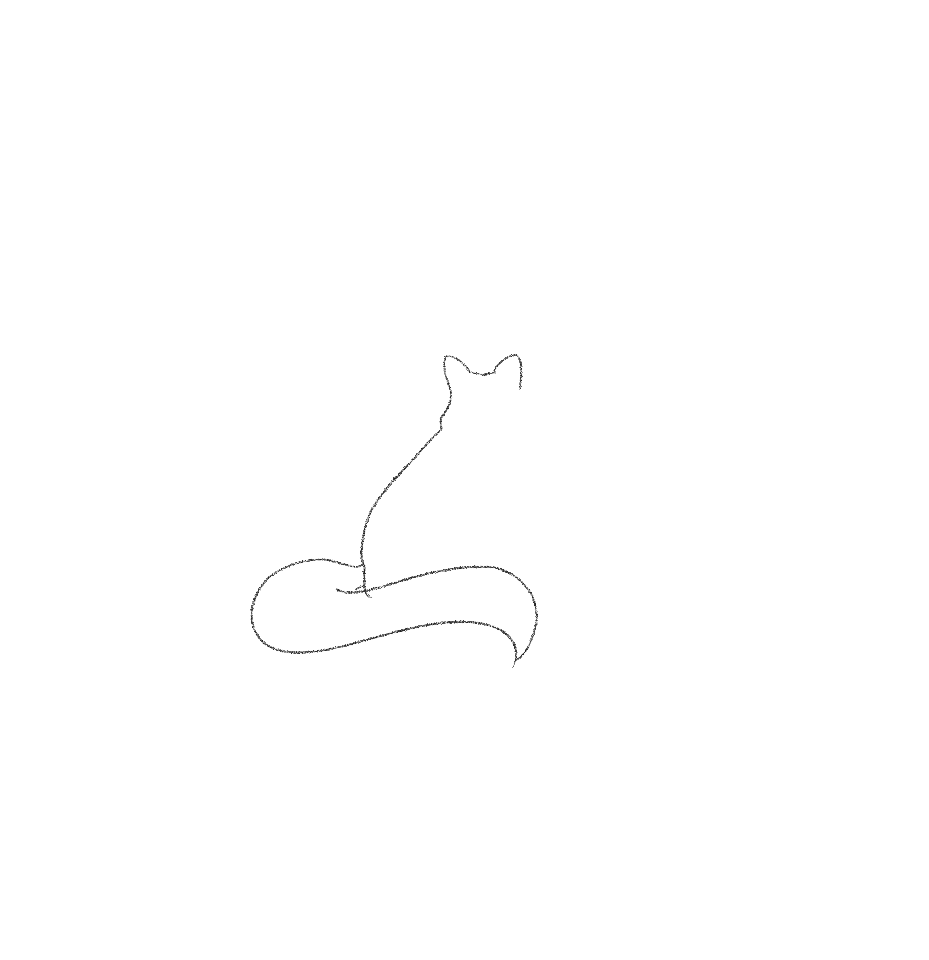
Step 4: Complete fox tail

Where you make that downturn on the C, create another line coming back in towards the other end, as you can now see, we've made a tail!
Step 5: Draw fox ears

Now at the end of the first ear, we'll make a very short straight line before creating a second ear in a soft triangle shape.
Step 6: Draw fox mouth

Bringing the ears down into a little outer flick continues that outer flick just once, but shorter than the first one.
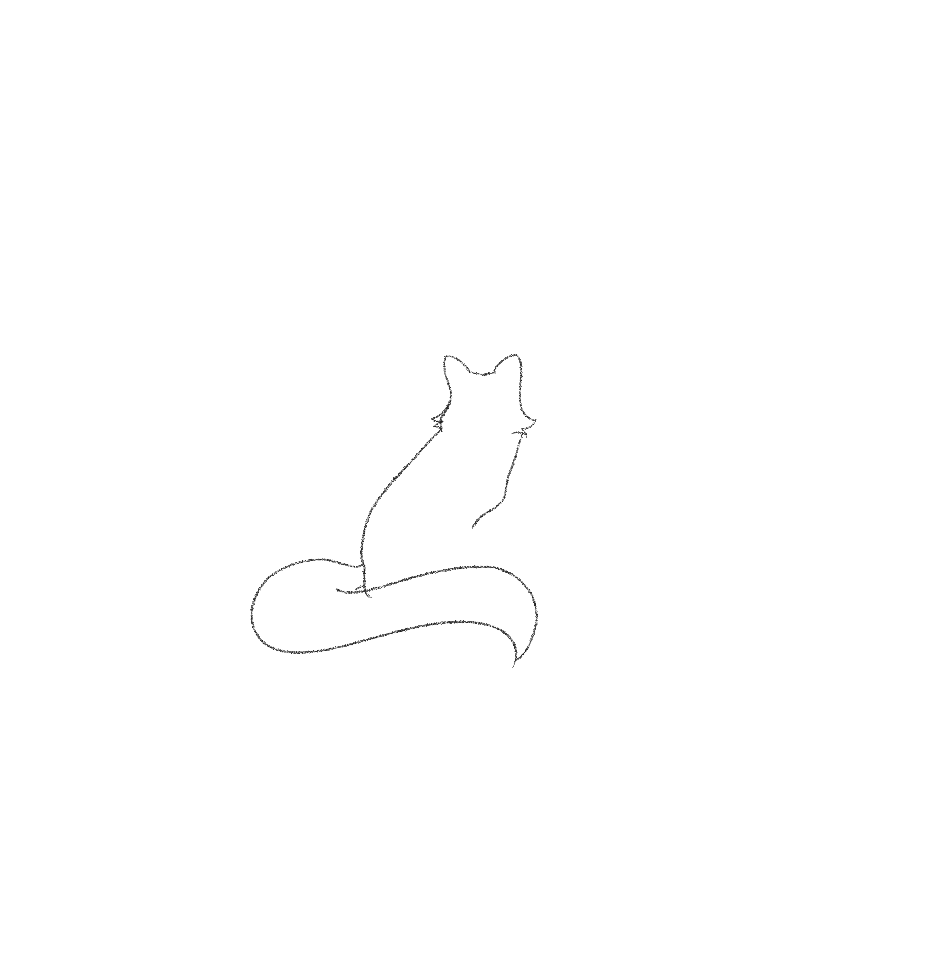
Step 7: Add line for fox body

Now we'll bring in the body.
Coming down in a semi-straight line from the cheeks, we're going about halfway down before adding a small inner arc that is only slightly curved.
This is the beginning of the guideline for our front paws
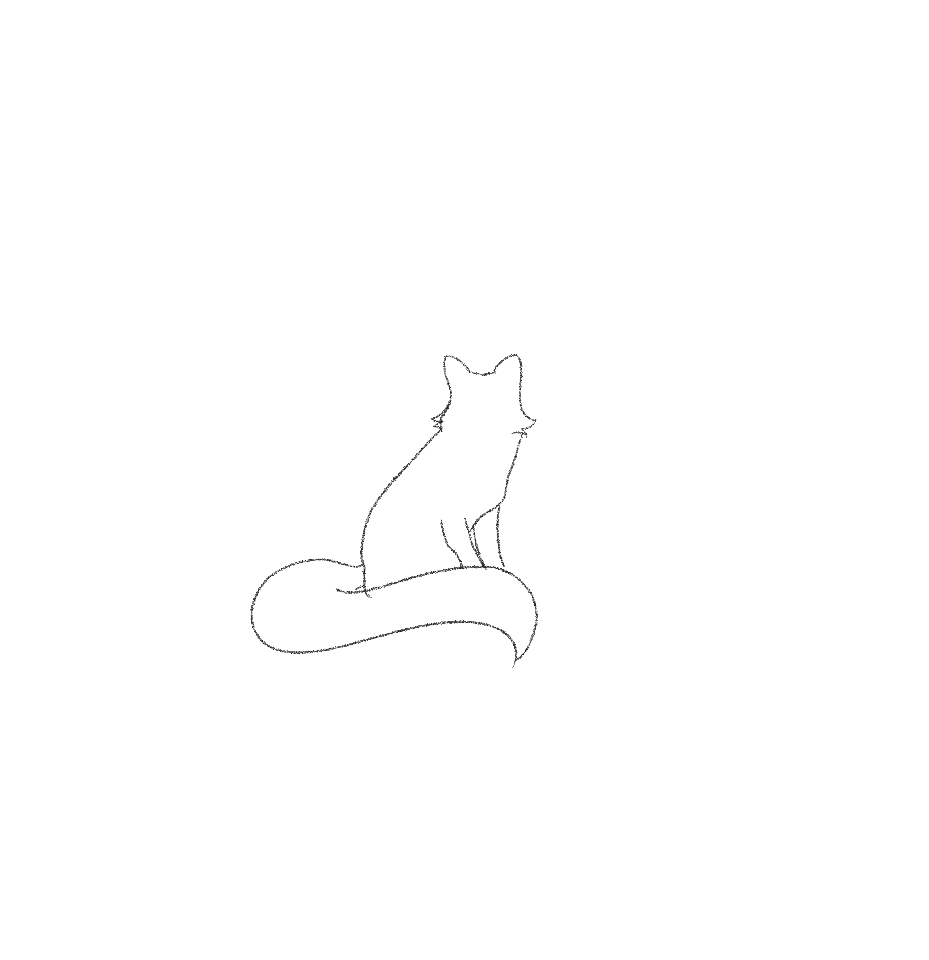
Step 8: Draw fox legs

Where that inner line we just made ends, we'll add a slight inner curved line going diagonally across and ending at the tail, then on the other side of that line we'll do the same.
For the inner leg, make a little bit of a squiggly line with sharper edges to account for the knee joint of the foxes leg.
Step 9: Draw fox hind leg

Now for the hind leg.
This step is really simple!
At the largest end of the back line we'll make a rounded line going downwards and ending at the tail!
Step 10: Add detail to fox ears

Now we'll start doing details.
Erase the overlapping line at the cheeks so the fur tufts are standalone.
Now up to the ears make another soft triangle line on the inside of the previous ones to create the inner ear.
Step 11: Add fur to fox ears

Continuing on from the previous step create a bit of zig zag lines to close off the inner ear with some fur
Step 12: Draw fox snout

Now, for the nose. In between the cheek fluffs create a U shape.
At the bowl of the U create two small U's with the connecting line in the middle of them, then in the space below create a very small U for the chin!.
Now where the two smaller u's of the snout meet we'll make a heart shaped nose and fill in black
Step 13:Draw fox eyes

Moving upwards we'll create two diamond shaped eyes slanted upwards diagonally.
These are the eyes!
Step 14: Fill in fox eyes

Fill the eyes in black. Now more details to do are to mark off where the Fox has different color fur!
These places are the chest, the belly, the front legs, the back leg, and the tip of the tail.
Fill in the front legs black where you marked off the different fur color.
Step 15: Add fox pupils

Using a white color create 2 dots per eye for highlights
Step 16: Fill in fox with a color

Fill the fur in with the proper colors (though I used grey here you can do this with color as well!)
I'd like to thank Carolyn for sharing her process.
If you like these drawings be sure to drop by her Twitter or check out her amazing illustrations on her shop.
Active Time 15 minutes
Total Time 15 minutes
Difficulty Easy
Estimated Cost $0
Materials
- Pencil
- Paper
- Or tablet and stylus
Tools
- Pencil
- Paper
- Or tablet and stylus
Instructions
- Step 1: Draw a line for the fox head. Start with a small squiggly line

- Step 2: Draw a line for fox back. Continue the line at the bottom with a wide curve getting larger at the base

- Step 3: Draw a line for the fox tail. At the end of that line, we'll start the guideline for the tail!
A little above where you ended the previous line we'll create a very elongated "C" shape with a downward turn. At the same time back at the top, bring a rounder line downward from the peak. Here we have an ear!
- Step 4: Complete fox tail. Where you make that downturn on the C, create another line coming back in towards the other end, as you can now see, we've made a tail!

- Step 5: Draw fox ears. Now at the end of the first ear, we'll make a very short straight line before creating a second ear in a soft triangle shape.

- Step 6: Draw fox mouth. Bringing the ears down into a little outer flick continues that outer flick just once, but shorter than the first one.

- Step 7: Add a line for a fox body. Now we'll bring in the body. Coming down in a semi-straight line from the cheeks, we're going about halfway down before adding a small inner arc that is only slightly curved. This is the beginning of the guideline for our front paws.

- Step 8: Draw fox legs. Where that inner line we just made ends, we'll add a slight inner curved line going diagonally across and ending at the tail, then on the other side of that line we'll do the same.
For the inner leg, make a little bit of a squiggly line with sharper edges to account for the knee joint of the foxes leg.

- Step 9: Draw fox hind leg. Now for the hind leg. This step is really simple! At the largest end of the back line we'll make a rounded line going downwards and ending at the tail!

- Step 10: Add detail to fox ears. Now we'll start doing details. Erase the overlapping line at the cheeks so the fur tufts are standalone. Now up to the ears make another soft triangle line on the inside of the previous ones to create the inner ear.

- Step 11: Add fur to fox ears. Continuing on from the previous step creates a bit of zig-zag lines to close off the inner ear with some fur.

- Step 12: Draw fox snout. Now, for the nose. In between the cheek fluffs create a U shape. At the bowl of the U create two small U's with the connecting line in the middle of them, then in the space below create a very small U for the chin!.
Now where the two smaller u's of the snout meet we'll make a heart-shaped nose and fill in black.

- Step 13: Draw fox eyes. Moving upwards we'll create two diamond-shaped eyes slanted upwards diagonally. These are the eyes!

- Step 14: Fill in fox eyes. Fill the eyes in black. Now more details to do are to mark off where the Fox has different color fur!
These places are the chest, the belly, the front legs, the back leg, and the tip of the tail. Fill in the front legs black where you marked off the different fur color.

- Step 15: Add fox pupils. Using a white color create 2 dots per eye for highlights.

- Step 16: Fill in fox with a color. Fill the fur in with the proper colors (though I used grey here you can do this with color as well!)

Source: https://jaejohns.com/how-to-draw-a-fox/
0 Response to "How to Draw a Fox Easy Step by Step"
Postar um comentário